16 Awesome Websites, Apps & Tools for Web Cartoonists – Business Advice

Recently I wrote about the cartooning tools I use. You know, pens, pencils, paper, and the like. Anyway, at the end I said:

There’s a whole separate set of tools for running the business, and probably another for running the site, but those are posts for another time.

Well, it’s time.

I’m going to show you the various websites, apps, and tools I use to make the business of running Andertoons.com work.

Note – while most of what I’ll be talking about are sites and services available to anyone, I will discuss a few that are Mac specific. I’m also not going to reveal absolutely everything I use, but there’s plenty here to keep a cartoonist busy.

OK, let’s begin with a few from Google…

Google Analytics

Google Analytics

Platform: Web   Price: Free   Ease of use: Intermediate

This should at the very least sound familiar to you. If you’re running any sort of site for any amount of time you’re going to run across Google Analytics.

Simply put, you insert a snippet of HTML into your site and you get a good look at who’s looking at what, when, how, and more.

For the most part I like the data I get here, and I’ve been using it for years, so I can compare stats over time. But some recent changes (I’m looking at you, search queries) have made it slightly less useful.

I’ve tried some other ways to look at my site’s data, but Google Analytics is what I’m used to, and it’s still very powerful.

Google Apps Email

email

Platform: Web   Price: Free    Ease of use: Novice

So, your email is probably something like “mycartoons@gmail” or “tomcartoonist@yahoo.com,” right? (Please tell me it’s not an AOL email. That’s fine, but if you’re looking to up the professionalism, you’ll want an email like “tom@toms-cartoons,” and Google’s Apps Gmail is an easy way to do it.

It’s been a while since I set it up, but I remember it being relatively painless. Plus it integrates nicely with your both your home computer and your smartphone.

Mac users – give Mailplane a try. It’s a perfect combination of Gmail and a desktop mail app.

OK, one more from Google…

Google Reader
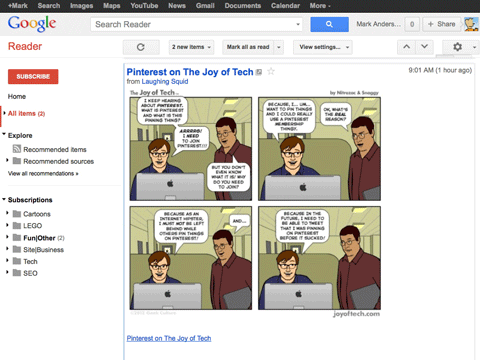
reader

Platform: Web   Price: Free    Ease of use: Novice

If you’re going to working online you’re going to need to be up to date on any number of blogs, and Google Reader is a dead simple way to do it.

Subscribing and organizing is easy, and the interface, though utilitarian, works nicely.

Mac users – Reeder pretties up the desktop experience, and Flipboard is beautiful on your iThingy.

OK enough Google. Let’s get down to running your cartoon website.

Rackspace Cloud Server
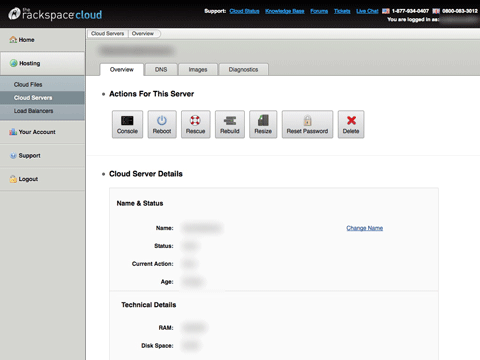
rackspace

Platform: Web   Price: Depends on usage   Ease of use: Advanced

There’s all kinds of web hosting out there, but when you’re really serious about keeping your cartoons up and running, a Rackspace Cloud Server is the way to go.

To be fair, this is something my developer set up for me, but on the very rare occasion when there’s been a service hiccup, the folks at Rackspace have been able to talk me down to a safe landing.

You’re going to pay for quality here, but you’re running a business, right?

Github

github

Platform: Web   Price: $7 mo.  Ease of use: Advanced

Github is a little difficult for me to explain, but I like it. Here’s how Wikipedia describes it:

Github is a web-based hosting service for software development projects that use the Git revision control system. The site provides social networking functionality such as feeds, followers and the network graph to display how developers work on their versions of a repository.

Here’s my experience – I can queue up and communicate about future projects and current problems with my developer(s) quickly and easily. It also helps to track and document changes to code so you know who did what when. I’m also able to do some coding in Github, but I’m still getting up to speed on it.

Obviously I’m no expert on this, but if your developer suggests it, I’d go along.

3Hub

3hub

Platform: Mac   Price: $2.99   Ease of use: Intermediate

My cartoons and other images are hosted on Amazon’s S3, which keeps Andertoons running speedily. And while you can upload and download images via Amazon’s interface, the 3Hub app is more Mac-like.

Drag and drop simple, and setting headers and permissions is a snap.

Dropbox

dropbox

Platform: Web/Mac/PC   Price: Free up to 2GB   Ease of use: Novice

When I was on vacation for two weeks with the family unit last summer, I used Dropbox to deliver a cartoon from my iPhone to a client while we watched red pandas playing at the zoo.

That alone would make Dropbox worth it, and I could list anecdote after anecdote about how I use it, but you really need to try it out and see for yourself.

Be warned, you won’t be able to get along with out it.

Paypal

paypal

Platform: Web   Price: Depends on usage   Ease of use: Novice

I’m not going to spend a lot of time on Paypal because it’s something you’re probably very familiar with, but I use it often for invoicing clients, paying vendors, and ordering LEGO.

Authorize.net

authorize.net

Platform: Web   Price: Depends on usage   Ease of use: Advanced

I do a fair amount of e-commerce at the site and Authorize.net is what I use for handling credit cards. I’ve been using it so long and I’m so used to it that I can’t really speak to the ease of signup or set-up, but they’re very stable and reliable.

One recommendation – when you’re filling out the initial paperwork you’re not going to want to use your name as the company. Use your website URL or company name instead. That info is going to show up on people’s credit card statements, and I’ve had the experience of more than a few people calling to say “Who is this Mark Anderson and why is he charging $30?!?!”

It took a bit of paperwork wrangling so Andertoons.com showed up instead, and if you can avoid that I’d recommend it.

Cross Browser Testing
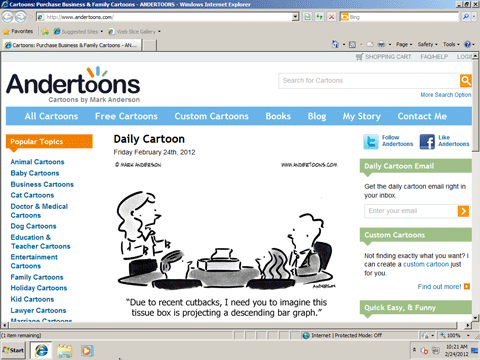
browser testing

Platform: Web   Price: $29.95 mo.   Ease of use: Intermediate

I don’t use Cross Browser Testing a lot, but when I’m rolling out a new site or some important change, it’s a good way to make sure that someone running an old browser on an older OS isn’t seeing a lot of gobbledygook instead of cartoons.

Pricing is a little higher than I’d like, but the peace of mind is more than worth it.

WordPress

wordpress

Platform: Web   Price: Free   Ease of use: Intermediate

I’ve been blogging about cartooning for a looooong time. I think I started at Blogger, moved to Movable Type, then TypePad, then over to WordPress which is what I’m using now.

You can pay to have WordPress take care of the heavy lifting of hosting and all that. but I host it at Andertoons. Themes, add-ons and upgrades are easy peasy, and it makes blogging a breeze.

One more thing – don’t believe anyone who says blogging is dead. Good content (especially cartoons!) delivered regularly never goes out of style.

Hootsuite
hootsuite

Platform: Web    Price: Free  Ease of use: Novice

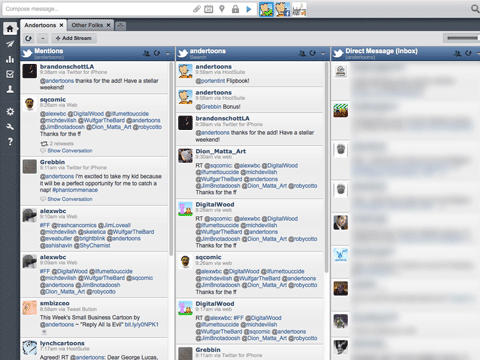
If you’re running a website, you’re doing social media (or you won’t be running a site for long). Hootsuite is a great way to keep your social stuff organized and updated.

Twitter, Facebook, stats, URL shortening, scheduling, RSS, mobile apps, it’s got it all.

I use the free version, but that Pro plan is looking better and better to me.

Buffer
buffer

Platform: Web   Price: 10 queued tweets free   Ease of use: Novice

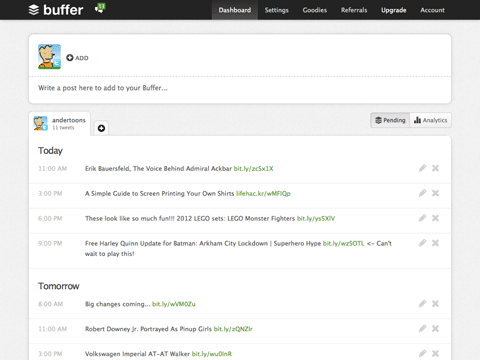
Once you really get into tweeting it’s easy to overdo it. You tweet, retweet some friends’ cartoons, retweet some interesting links, and pretty soon your followers are begging for the fail whale to return.

Buffer is like a sensible friend that helps you step back and take a good look at what you’re sharing. It schedules your social media at a reasonable pace and at times when your friends and followers are most likely to actually read them. Plus there’s a handy bookmarklet!

1Password

1password

Platform: Mac/Windows   Price: Varies   Ease of use: Novice

The more you do online, the more passwords you need to create. And the more you create, the easier they are to forget.

1Password generates unique random passwords for pretty much anywhere you go online that you can unlock and autofill with one master password.

Pure awesomeness. And although it might take you a while to get used to that one longish oddball password you create, after a while your fingers will fly over the keys while you smile happily.

Renamer

renamer

Platform: Mac   Price: $14.99   Ease of use: Novice

Renamer is an app I only use every so often, but when I need to add a letter to into the filename of say 6000 cartoons, I thank the app gods for its existence.

Quickbooks
quickbooks

Platform: Mac/Windows   Price: Varies   Ease of use: Intermediate

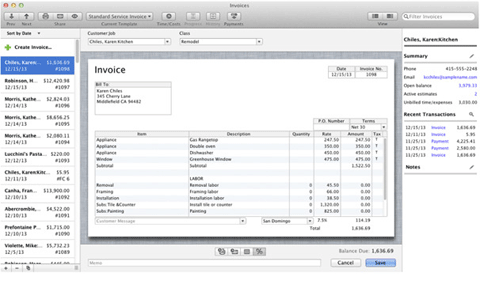
I started doing my accounting with a self-made spreadsheet. Then Quicken & TurboTax. Now it’s Quickbooks and an accountant.

I know the Mac version is supposed to be severely lacking in feature compared to the Windows version, but for what I need it to do it’s fine. Easy to use, easy to coordinate with my accountant, but more expensive than I’d like, and no easy way to take my data elsewhere.

A necessary evil.

Well, that about sums it up

As I said at the beginning, I haven’t listed every trick up my sleeve, but if you’re serious about the business of web cartooning it’s a fairly comprehensive list.

How To Draw A Cartoon Elephant – Tutorial

I remember as a kid I used to love those Ed Emberly‘s how-to-draw books. I’m sure I still use some of the ideas I learned from those.

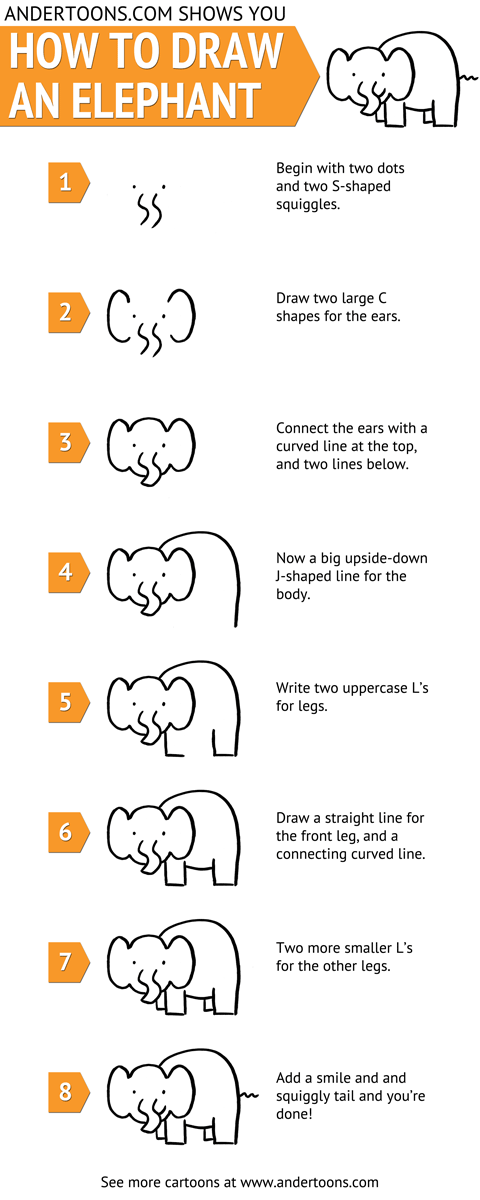
And it’s in that spirit that I’m starting another new feature here at the cartoon blog, How To Draw tutorial infographics!

First up is how to draw a cartoon elephant! (Click on the image below to enlarge it.)

how to draw cartoon elephant 480

Not bad, huh? It’s amazing what you can accomplish with basic shapes and letter forms! Feel free to grab it, use it, and pass it around. (If you post it I’d of course appreciate a link back.)

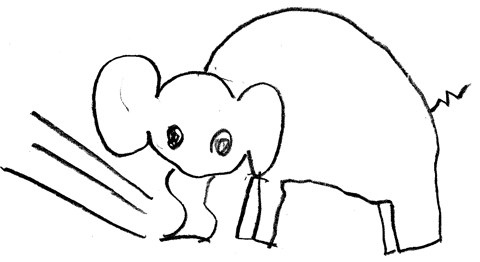
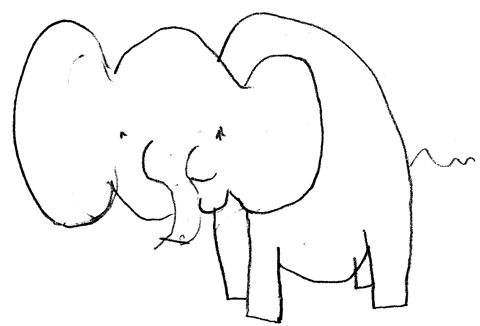
For testing purposes, and a bit of fun, I asked my kids to take a crack at the elephant to see how it worked. Here are their drawings:

cartoon elephant 1

My 5-year-old girl’s

cartoon elephant 2

My 8-year-old boy’s

Pretty good if I do say so myself!!

So there you go! Now you can draw your very own cartoon elephant! Go forth and trumpet all about your new talent!

(BTW, I’ve also got some elephant cartoons if you’re interested.)

Adding a Cartoon (Or Any Other Image) To Your iBook in iBooks Author – Tutorial

As I’m sure you’ve heard, Apple recently entered the textbook market in a big way. They’ve partnered with Pearson, McGraw Hill, and Houghton Mifflin Harcourt, revamped the iBooks app/store, and created the iBooks Author application to make publishing and selling books quick and easy. This is a big deal, and I’ve got a front row seat being married to an educator and having two children in school.

But as exciting as it is educationally, as a cartoonist I’m thrilled not only by the self-publishing opportunities for myself and other artists, but by what could conceivably be a whole new market for cartoons.

I can imagine all kinds of people writing and selling all kinds of books via iBooks Author, so I thought I’d explain the process of inserting a cartoon (or any other graphic) to help liven up all of that text.

Starting Your iBook

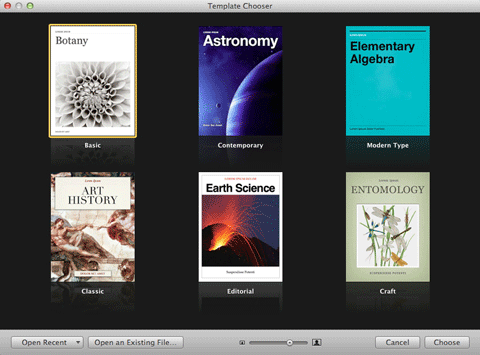
The first thing you’ll need to do is download the free iBooks Author app from the App Store and wait for it to install. Open iBooks Author and you’ll be greeted with the Template Chooser:

ibook cartoon templates

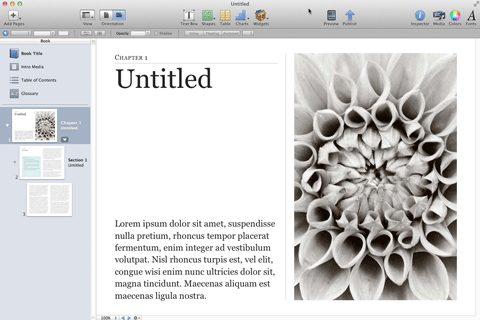
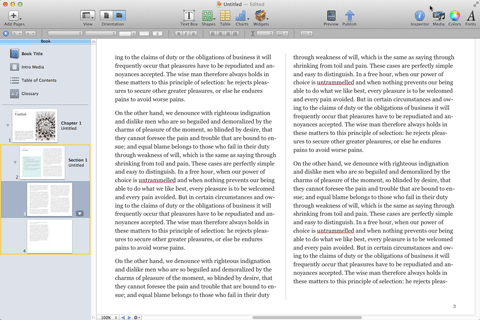
For the purpose of this tutorial we’re going to choose the generic Botany textbook. Click on it and you’ll be greeted with the book’s first chapter in landscape orientation:

ibook cartoon template

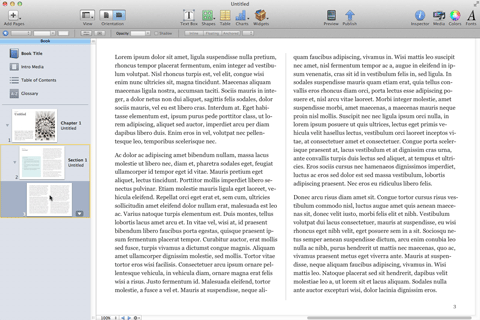
Apple has already included a stock image to show you how much an image can improve your book, but we’re going to navigate to page three where there’s a huge swath of text just waiting for a funny cartoon to liven things up:

ibook cartoon text

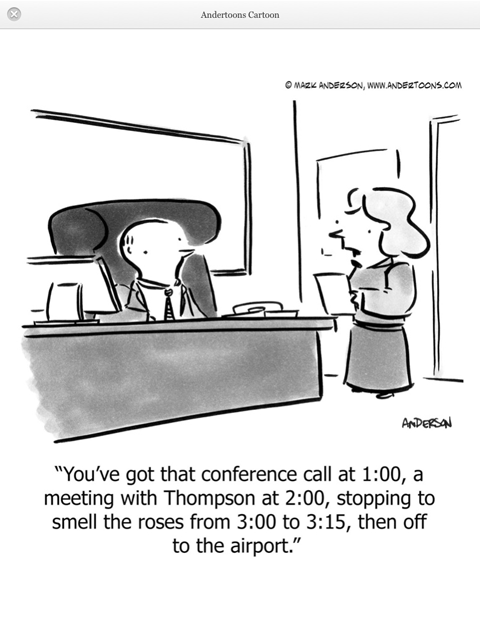
Because this is a botany iBook, I’ve chosen this one about roses:

Now let’s get started!

Inserting Your Cartoon

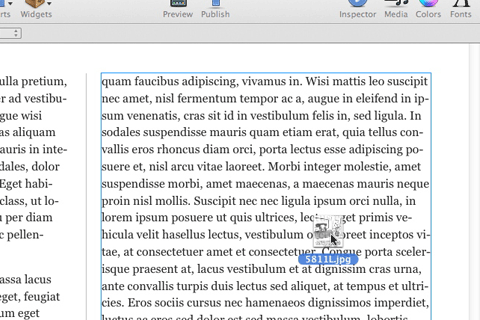
There’s a number of ways to import your image, but I’m just going to grab the JPEG off of my desktop and drag it over the text:

ibook cartoon drag jpeg

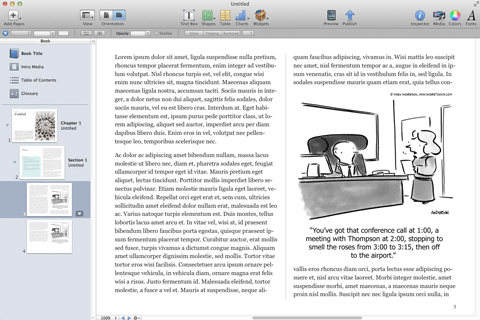
Here’s how the image looks inserted into the text:

ibook cartoon placement

Nice, huh? Just what all those words needed.

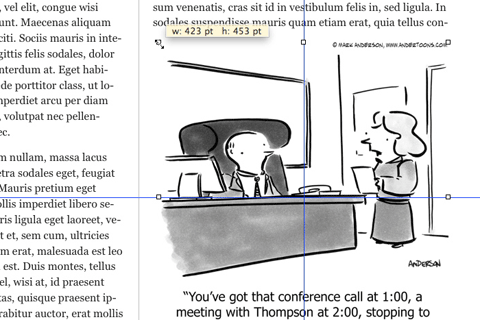
The cartoon is placed on the page by default as either an anchored or floating object (that will be important later) which can be moved, resized, and aligned with some intuitive clicking and dragging:ibook cartoon center resize

Now our iBook page is looking just like we’d like it to. Let’s preview it on our iPad to see how it will look to our soon-to-be readers.

Connect the iPad to your computer, open iBooks, and, if you’re like me, you’re going to preview it in portrait orientation first:

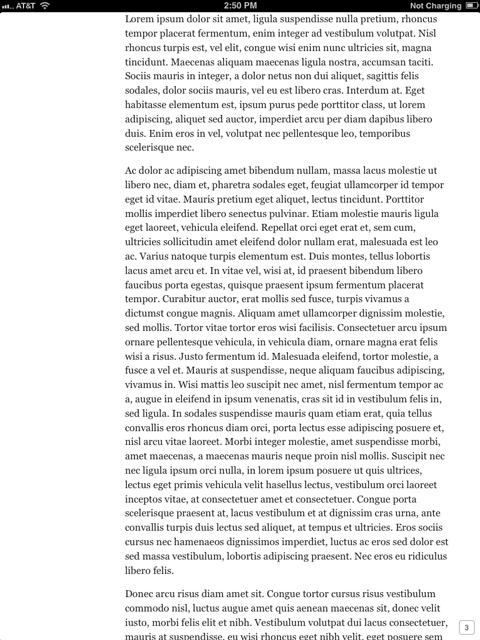
ibook cartoon ipad portrait 1

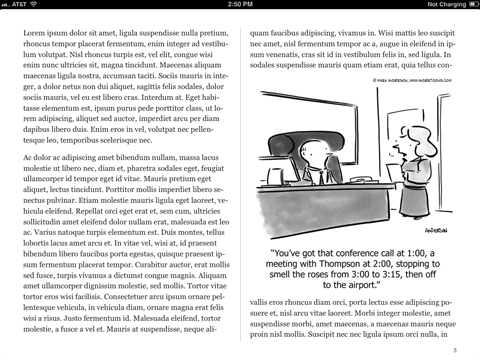
Here’s a screen shot of page 3 from my iPad, but where’s the cartoon!? And what’s with all that white space on the left? Flip the iPad 90 degrees and you’ll see it appear in landscape orientation exactly as you inserted it:

ibook cartoon ipad landscape 1

So what’s going on? Where’s the cartoon in portrait?!

There are two ways to deal with this. The first changes some elements of the existing image, the second is a different way of bringing images into your iBook. Let’s start with what I think is the simpler of the two:

Adding a Title or Caption

Images imported into iBooks Author are referred to as objects, and there are three different kinds of objects. You might remember earlier I said that images are inserted by default as either anchored or floating objects. Those two types of objects don’t appear in portrait orientation unless you give them either a title or a caption. Thankfully, that’s pretty easy to do.

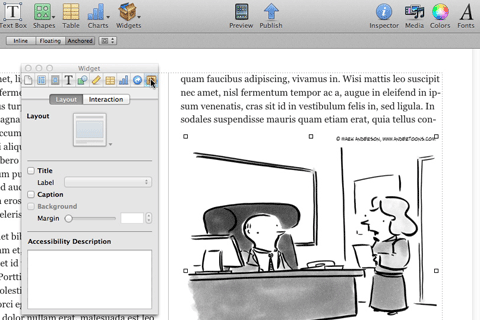
Click on your image, then click Inspector in the upper right menu bar. Next click the rightmost icon in the Inspector menu; it looks like a folder with a gear on it. (If you leave your mouse on it you’ll see “Widget Inspector.”)

ibook cartoon title caption

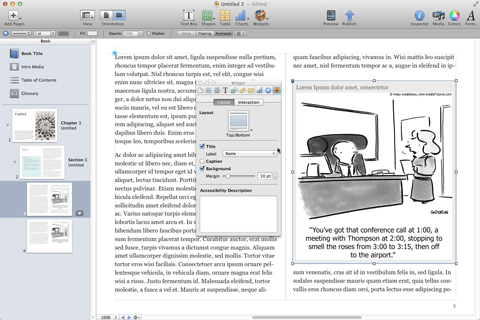
Click the Title check box underneath Layout and your cartoon now has a dummy text title as well as a light gray border around it:

ibook cartoon title changes

You can also opt to add a caption below the image instead, but since the image we’re using is a cartoon, I chose a title. I also played with the background and margin settings. Now let’s look at it in portrait orientation again on the iPad:

ibook cartoon portrait title 1

There it is in the upper left, and when you click on it:

ibook cartoon portrait title 2

Pretty nice. Here it is in landscape again with the title over the cartoon:

ibook cartoon landscape title

Now, you might not want that extra text above or below your image. In that case, still click Title or Caption, but just delete the dummy text and don’t replace it with anything. You get a little extra padding on the top and/or bottom, but it’s not obvious.

Adding A Cartoon Inline

I said earlier that there was another way to insert your cartoon into the text to make sure it appears in portrait mode, and that is to change the image to an inline object. This is best done when you’re first inserting the cartoon into the text, but it’s still fairly simple.

Let’s begin again with a page 3 full of text:

ibook cartoon inline prep

You could drag in your image and then change the object type to inline, but I’ve gotten some wonky results that way. Here is what I think is a better way to add images inline.

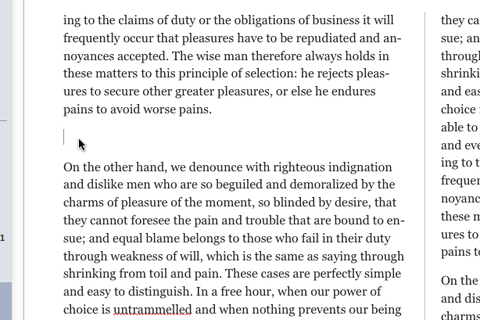
First, choose roughly where you’d like to add the cartoon and insert a blank line there. For this example I’m going to add it before the second paragraph on the left half of this page:

ibook cartoon inline blank line

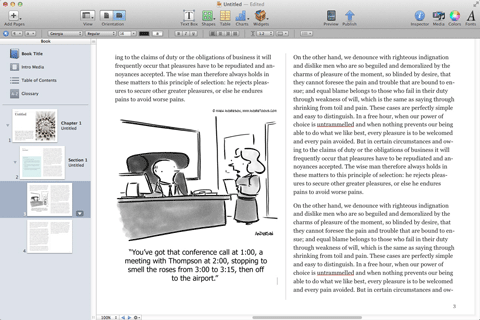
Now this is where it gets tricky. Press and hold the Command key, then drag the image off of your desktop and into the document where you left your blank line:

ibook cartoon inline insereted

It might take a little trial and error, but you’ll soon get the hang of it.

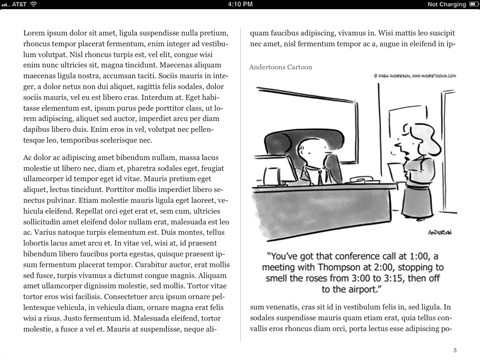
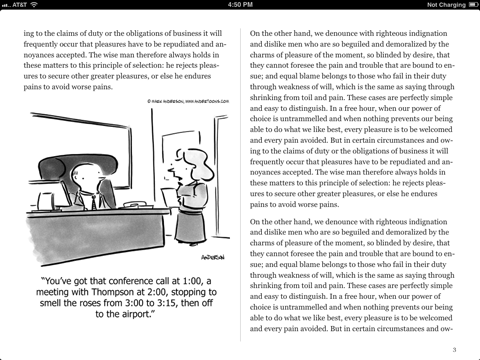
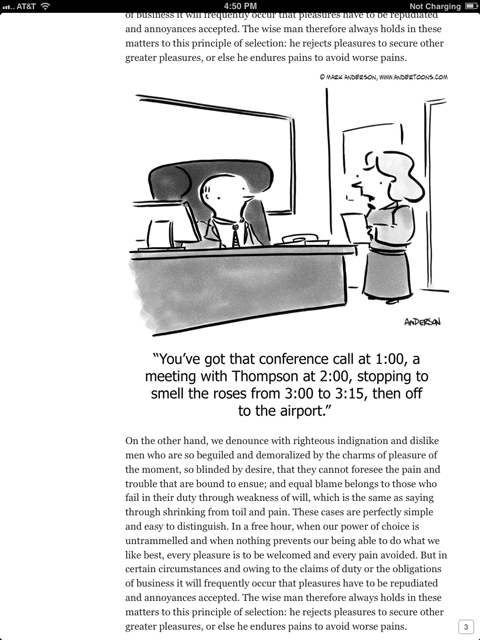
And now when we preview on the iPad we see the cartoon inline in both landscape and portrait orientations:

ibook cartoon ipad inline landscape

ibook cartoon ipad inline portrait

With the inline method of inserting your cartoon there’s also no need for title or captions. In fact those are not available to an object designated as inline.

You might be asking yourself why you’d want to present your images inline, but if you’re considering publishing an iBook collection of cartoons where there’s very little text, inline begins to make a whole lot of sense.

As exciting as this new opportunity is, both as a potential publisher and content provider, there’s bound to be some glitches in this first iteration of iBooks Author, but I’m finding it hard not to daydream about the possibilities. And I can’t wait to see how other people use this new tool!

So now that you understand how to insert a cartoon or other image into your new iBook, there’s the small matter of…

Buying Your Cartoon

Of course the first step to adding a cartoon is to find a relevant cartoon you’d like to include in your iBook. Andertoons has thousands of cartoons on thousands of topics that are super easy to browse, buy, and download. That being said, this is a brand new market and I’m a bit unsure as how to proceed as far as price.

Normally I charge hundreds of dollars per cartoon for textbook usage, but I’m envisioning a lot of independent authors self-publishing via iBooks Author, so I’m going to begin selling iBook cartoon usage at the $30 per I currently charge for presentations.

If you’re interested in buying a cartoon for your iBook, just click the $30 presentation button and follow the checkout – no need to email me for permission. If you’re a big name publisher, drop me a line and we’ll work out something fair.

I hope this helped explain how to add a cartoon or other image to your new iBook via iBooks Author. Anyone have have any big plans for an iBook?

A Cartoonist’s Tools

I think every cartoonist is sooner or later asked “what kind of pen do you use?”

My normal response is usually that there is no “right” or “best” pen. Each cartoonist finds, usually through years of trial and error, the correct tools for themselves. Some prefer pen and ink, some like the cheapest ballpoints. (And remember, even the best art needs good writing first.)

But I also remember starting out, getting answers like that, and wishing I’d gotten a different answer; or at least a place to start. And it’s in that spirit that I’m going to go through pretty much everything in my office and explain how and why I use it.

Just remember, your results may vary.

Paper

paper sketches

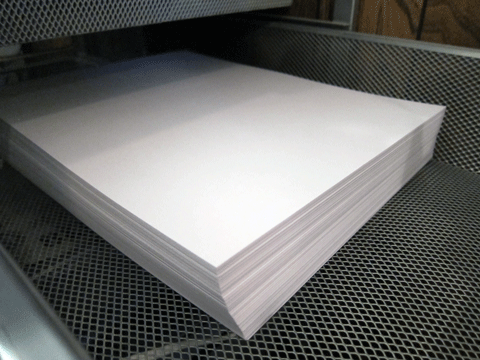
For sketching I use a 24 pound bright laser paper. Pretty much whatever is on sale. I could certainly go cheaper, but I like the way that combination feels to me.

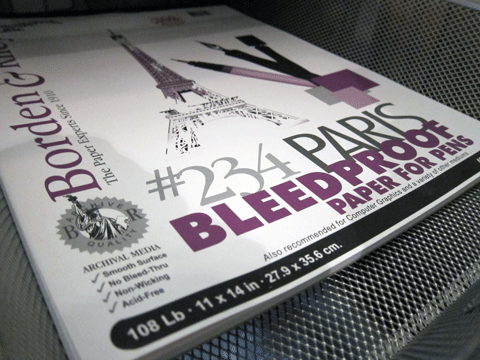
For final art I use Borden & Riley bleedproof paper for pens. It’s economical, and it stands up well to marker saturation.

paper art

I try to fit as many cartoons on a single piece as I can and then cut them out for scanning. You end up with all sorts of oddball shapes, but since I’m creating for reproduction, I don’t much care.

Pencils

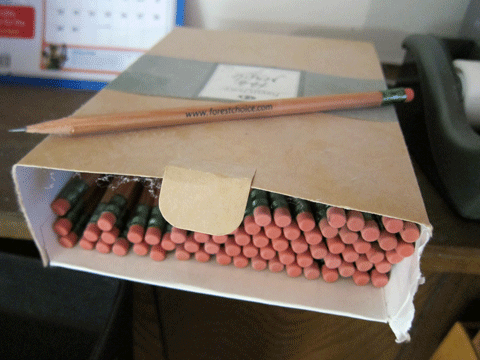
I’m really picky about my pencils, and ForestChoice #2‘s are my hands down favorites. They work great, feel great, sharpen great, they’re just perfect! I buy the 144-count box.

pencils

If you like pencils like I like pencils, do yourself a favor and try these. They’re so good!!

Pens

pens

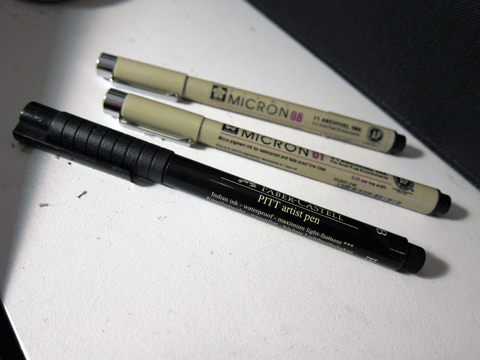
I use a few different pens for the final art: a Faber-Castell Pitt Artist brush pen, and varying thicknesses of Pigma Micron pens. Both stand up well to my punishingly heavy hand, stay black, and dry quickly, which I have to have because I work really fast.

Markers

markers

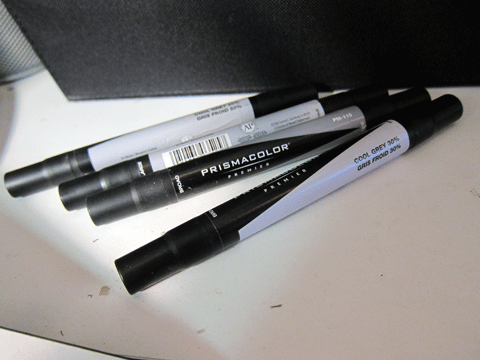
I’ve used Prismacolor cool greys for years and years, but lately I’ve been opting to use some virtual markers I created in Photoshop from scans of my Prismacolors on the Border & Riley paper. They’re not quite the organic feel of the real thing though, so I’m kind of on the fence here.

Desk

desk

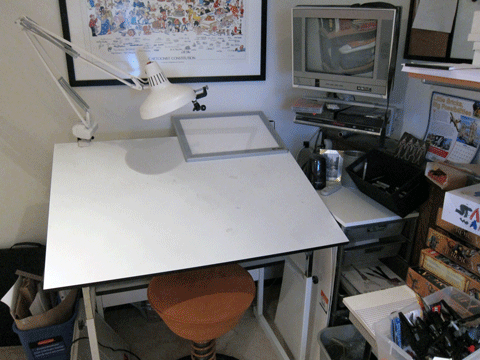
I preface this with the reminder that for probably half of my career I worked hunched over a coffee table in our living room. But when we moved to a larger house and I got an office I splurged on this Alvin drafting table. It’s nice to be able to work without sitting on the floor.

Stool

swooper

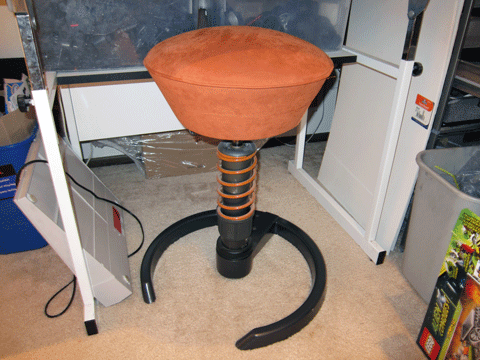
And while we’re talking about sitting, my Swopper stool was another I’ve-got-my-own-office  splurge. It takes a little getting used to, but my back continues to thank me.

Taboret

desk

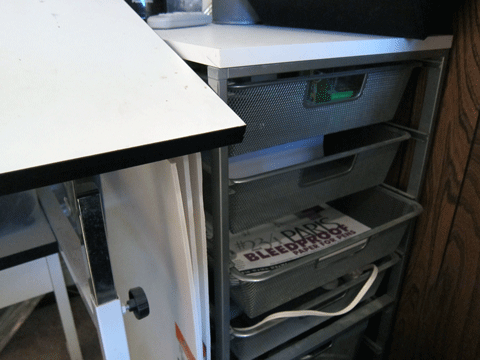
I built my own taboret (I had to look up the word “taboret.” I was going to call it my drawer thingy) out of various Elfa pieces at the Container Store. Easy, sturdy, and cost effective.

Light Desk

lightdesk

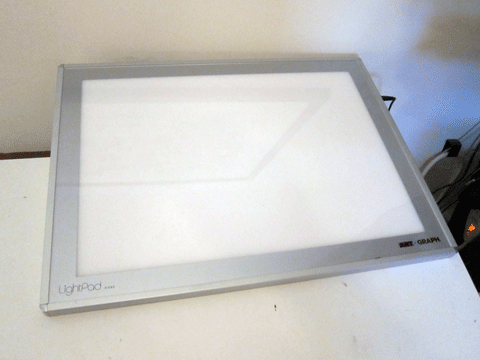
The way I work is to do a messy sketch, and then ink over it on my light desk. For years I used a much bulkier one, which was sort of hard to work on with my table, so this newer thinner LightPad is a Godsend. I still have trouble making the back “sticky” enough to store it on my desk though.

Lamp

luxo

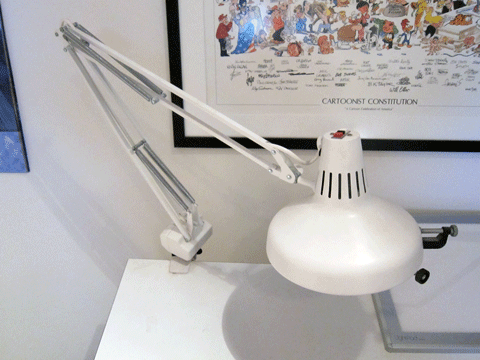
Your standard sturdy Luxo combo. This thing is awesome and I adore it.

iMac

mac

I’ve waxed poetic about my Mac before, and usually someone chimes in and tells me I’m paying for the name and I’m a jerk and all that. But when my last iMac had 2 weeks left in AppleCare, and the Genius Bar couldn’t figure out my problem, they gave me a brand new iMac and a new AppleCare to go with it. No questions asked.

Apple, you had me at hello.

BTW, I also run a MacBook, 2 iPads and an iPhone. Call me a fanboy, it all works.

Scanners

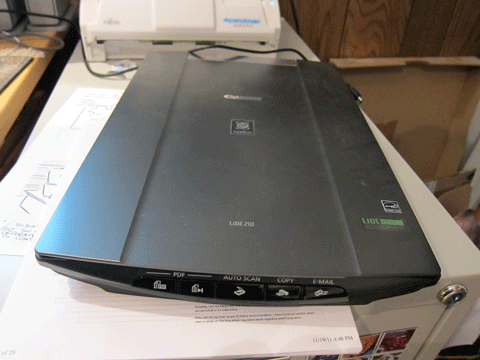
I had my last Canon scanner for more than 10 years, and I loved it dearly, but this fall it finally scanned it’s last Andertoon. I replaced it with another CanoScan and the results are just as good in like 1 third of the time:

scanner1

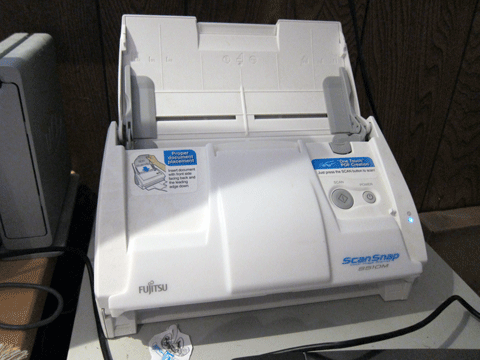
I also run this Fujitsu ScanSnap for auto scanning reams of paperwork, receipts, and cartoon cards. Love it!

scanner2

Wacom Intuos 3

wacom

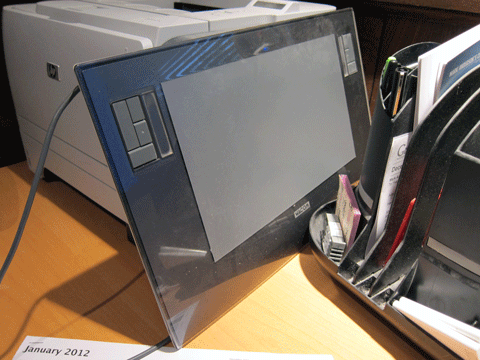
I still do so much work with actual ink on paper that I have yet to pony up for a Cintiq a new Intuos, or that Inkling thing. But when I need it, it’s a reliable workhorse. I couldn’t get along without it.

Photoshop CS5

cs5

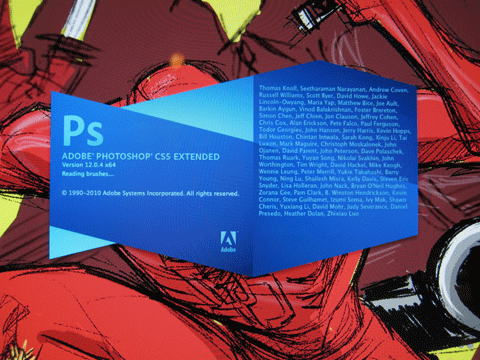
I have some sort of bundle of CS5 stuff, most of which I rarely use. I’m also betting that I use only about 5% of what Photoshop is capable of, but there you go. I did do some playing around in Flash a while back, and occasionally I poke my head into Illustrator to change some line art into vector, but mostly it’s a lot of Photoshop layer coloring, resizing, etc…

So that’s it. That’s what I use to create my cartoons. Someone just starting out certainly doesn’t need all of this. Pen, paper, and a computer with a scanner is pretty much the minimum though.

There’s a whole separate set of tools for running the business, and probably another for running the site, but those are posts for another time.

(Just in case you’re curious, here’s a video showing how I draw my cartoons, and here’s a more in-depth look at my cartooning process.)

So, what tools do you use?

5 Totally Amazing Cartoon/Comic Blogs and 1 Guilty Pleasure

It’s difficult to believe, but I’ve been blogging for over seven years now. That’s a long, loooong time. In fact, when I began my developer wasn’t yet familiar with the word “blog.” And every so often I think it’s a good to take a step back and take a critical look at what this blog is and should/could be. (Stick with me, the list of awesome cartoon blogs is coming right up.)

So recently, in addition to completely revamping the site, I’ve been rejiggering how and what I present here at the Andertoons Cartoon Blog. For a while I was blogging a wider range of interests in an effort to connect more personally with readers, and I think I’ve done that. (But just in case, I really like jazz trombone and LEGO.) But I think it’s time I got back to blogging more about cartoons.

My idea is this – blog less often, but more in depth, and mostly about cartoons. I’m tentatively looking at about one blog per week. (Probably on Tuesdays, but don’t hold me to that.) Occasionally it will be more, sometimes less, but when I write I’m going to really write.

But I don’t want to leave you out in the cartoon blog cold the rest of the week, so I’m going to recommend five additional totally amazing cartoon & comic related blogs you should read, and one awesome guilty pleasure.

(Note – a lot of these cartoonists are friends or acquaintances of mine, but I never said it was unbiased. So there.)

1. Mike Lynch Cartoons

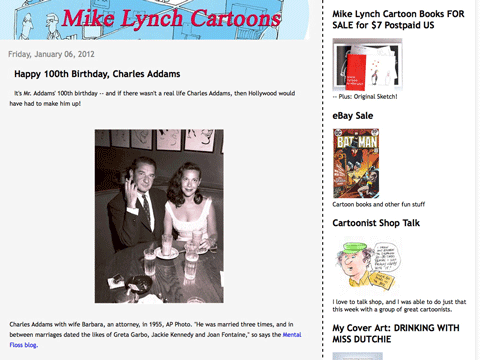
mike lynch cartoons blog

Mike’s long-running blog is a must read for any cartoonist or fan of cartoons. Honestly, there’s so much great stuff here it’s almost a crime to point out only a few notable posts, but here’s some current standouts to peruse:

Mike’s not only a cartoonist at the top of his game (and my brother-in-ink), he pretty much knows everyone and everything related to cartoons. Put Mike’s blog in your RSS reader ASAP!

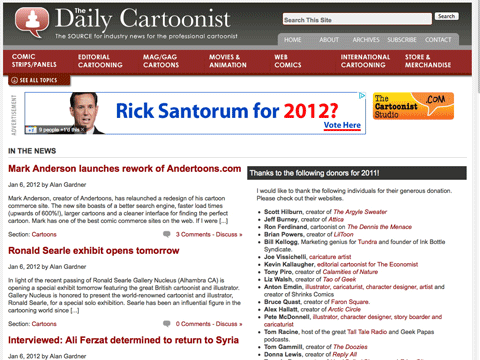
2. The Daily Cartoonist

daily cartoonist

Alan Gardner does a really great job of digging up all kinds of cartoon news, presenting it clearly and succinctly, and, in what I’m assuming is a massive undertaking, keeping his commenters on-topic and mostly civil. Some recent must-reads:

Wanna keep up on pretty much on all the latest cartoon happenings? Check out The Daily Cartoonist.
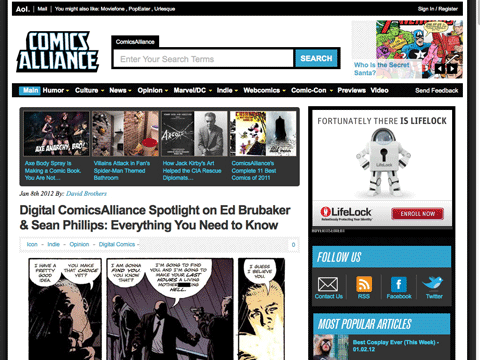
3. Comics Alliance

comics alliance

Covering the world of comics thoroughly and entertainingly is Comics Alliance. There’s just gobs of new, deep, and downright fun stuff here almost constantly. A few newish notables:

Laura Hudson and crew deserve top bookmark billing in any comic fan’s browser. Do it now!

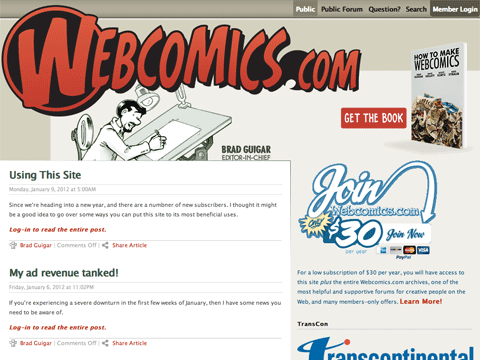
4. Webcomics.com

webcomics

So far I’ve featured blogs covering what can be considered the traditional mediums of cartoons, comic strips, and comic books, but the world of webcomics, if it hasn’t already become mainstream, is well on its way. And Brad Guigar’s Webcomics.com is a terrific guide. Here’s some fresh examples:

A quick note that this is the only entry here that charges for its content, but if you’re really serious about succeeding online it’s money well spent. Check it out and you’ll see what I mean.
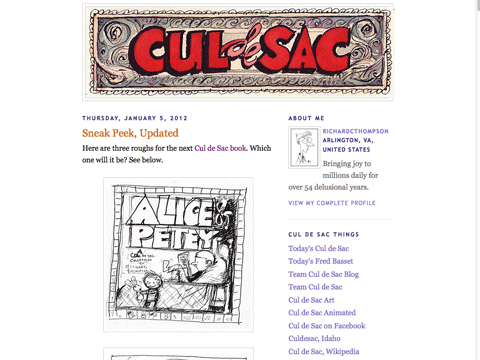
5. Cul de Sac

cul de sac

If you’ve by chance missed every other glowing review of Richard Thompson’s Cul de Sac, I think you could trust Calvin & Hobbes creator, Bill Watterson, who said, amongst other heady praise, “The artwork in Cul de Sac bowls me over.”

Even better, we all get an inside look at the Cul de Sac blog! A few of my recent faves:

Do not miss!

And last but not least, my favorite guilty pleasure:

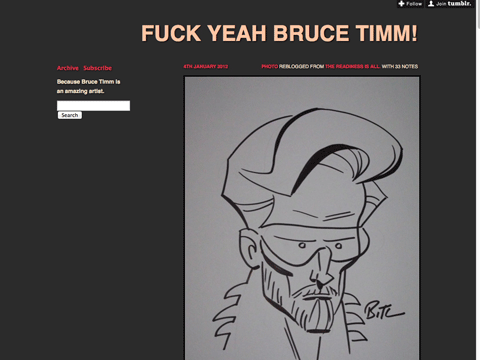
F**k Yeah Bruce Timm

f yeah bruce timm

I’m not sure I completely understand what makes Tumblr different from regular blogs, but there seems to be a whole host of these F**k Yeah Tumblrs. That being said, I love, no, LOVE Bruce Timm‘s art! So a constant stream of Timm awesomeness? I think F**k Yeah Bruce Timm about sums it up. A few recent posts:

OK, well that wraps it up. Please be sure to give each blog a try, and be sure to stop in each Tuesday (or even better, subscribe to my RSS feed) for more Andertoons Cartoon Blog goodness!