As I’m sure you’ve heard, Apple recently entered the textbook market in a big way. They’ve partnered with Pearson, McGraw Hill, and Houghton Mifflin Harcourt, revamped the iBooks app/store, and created the iBooks Author application to make publishing and selling books quick and easy. This is a big deal, and I’ve got a front row seat being married to an educator and having two children in school.
But as exciting as it is educationally, as a cartoonist I’m thrilled not only by the self-publishing opportunities for myself and other artists, but by what could conceivably be a whole new market for cartoons.
I can imagine all kinds of people writing and selling all kinds of books via iBooks Author, so I thought I’d explain the process of inserting a cartoon (or any other graphic) to help liven up all of that text.
Starting Your iBook
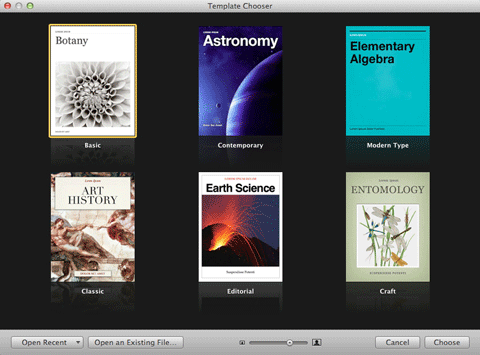
The first thing you’ll need to do is download the free iBooks Author app from the App Store and wait for it to install. Open iBooks Author and you’ll be greeted with the Template Chooser:
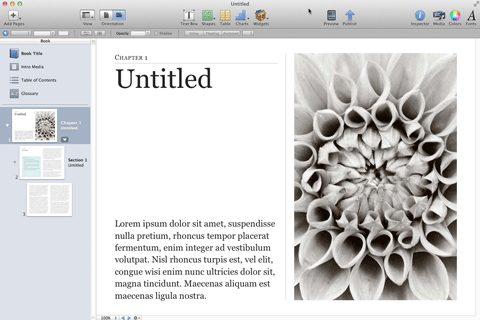
For the purpose of this tutorial we’re going to choose the generic Botany textbook. Click on it and you’ll be greeted with the book’s first chapter in landscape orientation:
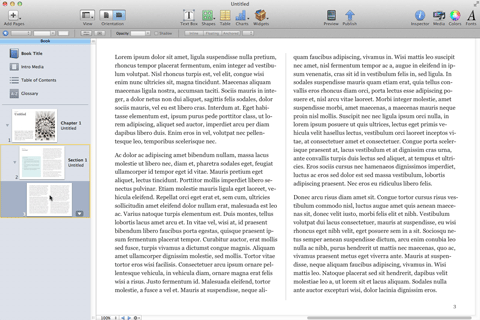
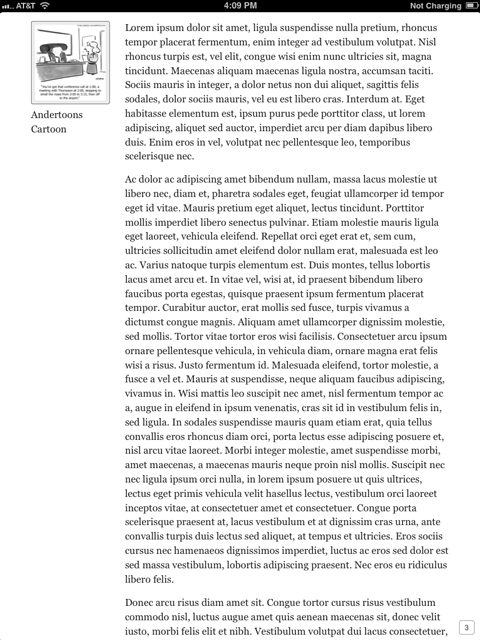
Apple has already included a stock image to show you how much an image can improve your book, but we’re going to navigate to page three where there’s a huge swath of text just waiting for a funny cartoon to liven things up:
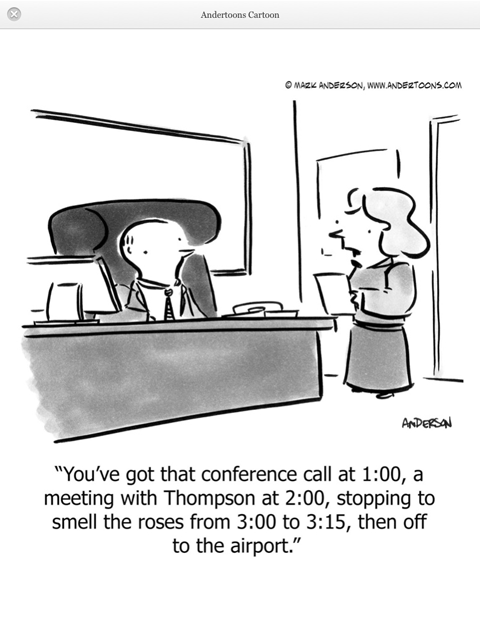
Because this is a botany iBook, I’ve chosen this one about roses:
Now let’s get started!
Inserting Your Cartoon
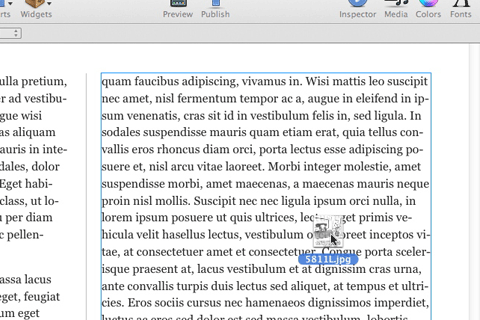
There’s a number of ways to import your image, but I’m just going to grab the JPEG off of my desktop and drag it over the text:
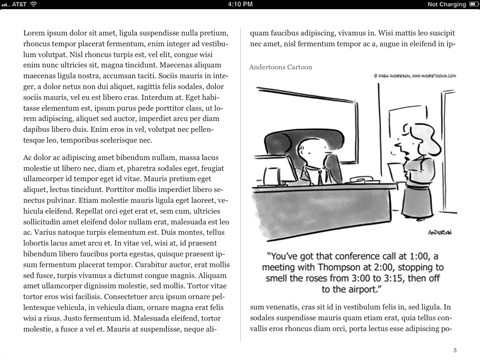
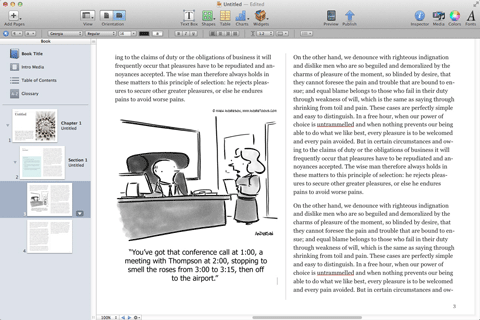
Here’s how the image looks inserted into the text:
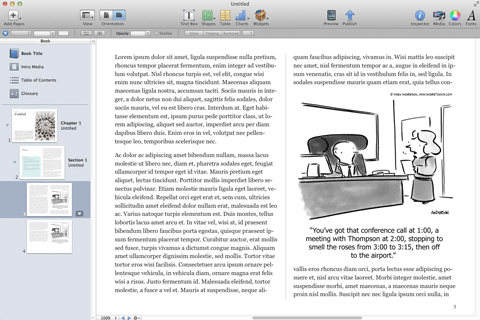
Nice, huh? Just what all those words needed.
The cartoon is placed on the page by default as either an anchored or floating object (that will be important later) which can be moved, resized, and aligned with some intuitive clicking and dragging: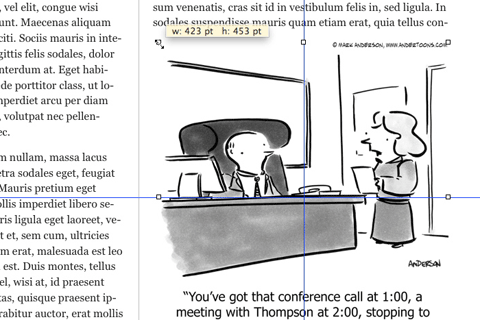
Now our iBook page is looking just like we’d like it to. Let’s preview it on our iPad to see how it will look to our soon-to-be readers.
Connect the iPad to your computer, open iBooks, and, if you’re like me, you’re going to preview it in portrait orientation first:
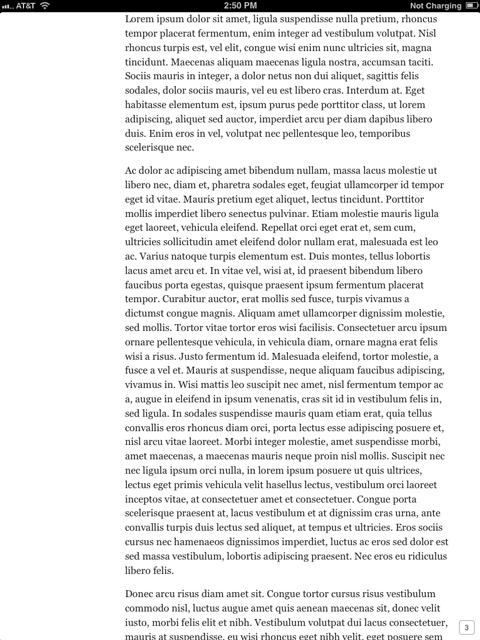
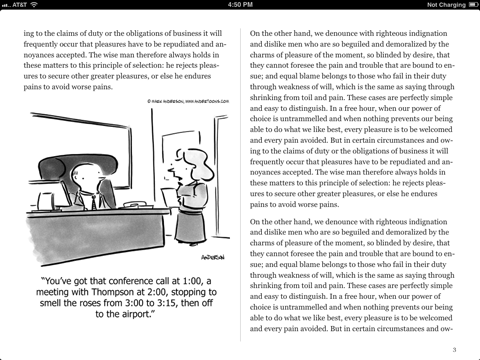
Here’s a screen shot of page 3 from my iPad, but where’s the cartoon!? And what’s with all that white space on the left? Flip the iPad 90 degrees and you’ll see it appear in landscape orientation exactly as you inserted it:
So what’s going on? Where’s the cartoon in portrait?!
There are two ways to deal with this. The first changes some elements of the existing image, the second is a different way of bringing images into your iBook. Let’s start with what I think is the simpler of the two:
Adding a Title or Caption
Images imported into iBooks Author are referred to as objects, and there are three different kinds of objects. You might remember earlier I said that images are inserted by default as either anchored or floating objects. Those two types of objects don’t appear in portrait orientation unless you give them either a title or a caption. Thankfully, that’s pretty easy to do.
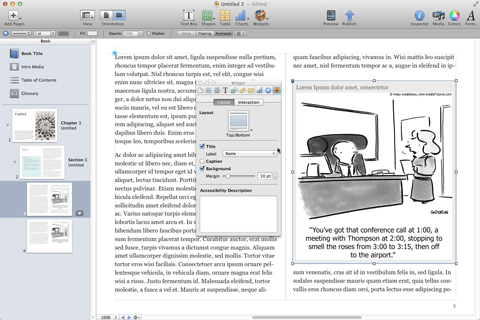
Click on your image, then click Inspector in the upper right menu bar. Next click the rightmost icon in the Inspector menu; it looks like a folder with a gear on it. (If you leave your mouse on it you’ll see “Widget Inspector.”)
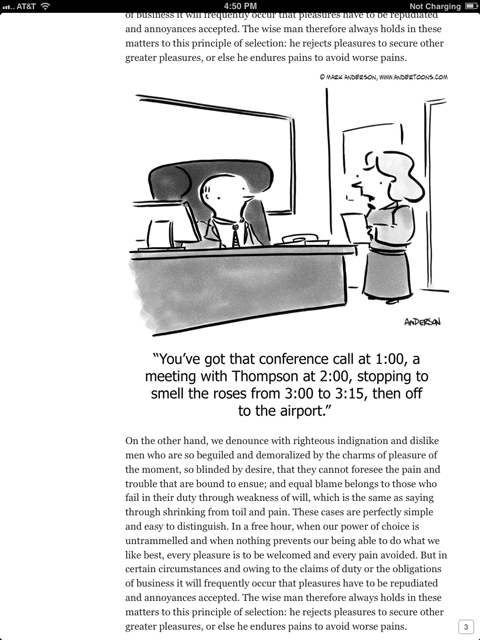
Click the Title check box underneath Layout and your cartoon now has a dummy text title as well as a light gray border around it:
You can also opt to add a caption below the image instead, but since the image we’re using is a cartoon, I chose a title. I also played with the background and margin settings. Now let’s look at it in portrait orientation again on the iPad:
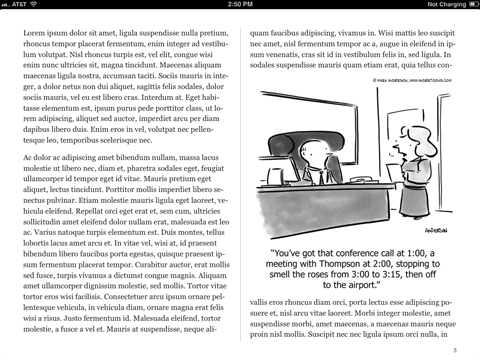
There it is in the upper left, and when you click on it:
Pretty nice. Here it is in landscape again with the title over the cartoon:
Now, you might not want that extra text above or below your image. In that case, still click Title or Caption, but just delete the dummy text and don’t replace it with anything. You get a little extra padding on the top and/or bottom, but it’s not obvious.
Adding A Cartoon Inline
I said earlier that there was another way to insert your cartoon into the text to make sure it appears in portrait mode, and that is to change the image to an inline object. This is best done when you’re first inserting the cartoon into the text, but it’s still fairly simple.
Let’s begin again with a page 3 full of text:
You could drag in your image and then change the object type to inline, but I’ve gotten some wonky results that way. Here is what I think is a better way to add images inline.
First, choose roughly where you’d like to add the cartoon and insert a blank line there. For this example I’m going to add it before the second paragraph on the left half of this page:
Now this is where it gets tricky. Press and hold the Command key, then drag the image off of your desktop and into the document where you left your blank line:
It might take a little trial and error, but you’ll soon get the hang of it.
And now when we preview on the iPad we see the cartoon inline in both landscape and portrait orientations:
With the inline method of inserting your cartoon there’s also no need for title or captions. In fact those are not available to an object designated as inline.
You might be asking yourself why you’d want to present your images inline, but if you’re considering publishing an iBook collection of cartoons where there’s very little text, inline begins to make a whole lot of sense.
As exciting as this new opportunity is, both as a potential publisher and content provider, there’s bound to be some glitches in this first iteration of iBooks Author, but I’m finding it hard not to daydream about the possibilities. And I can’t wait to see how other people use this new tool!
So now that you understand how to insert a cartoon or other image into your new iBook, there’s the small matter of…
Buying Your Cartoon
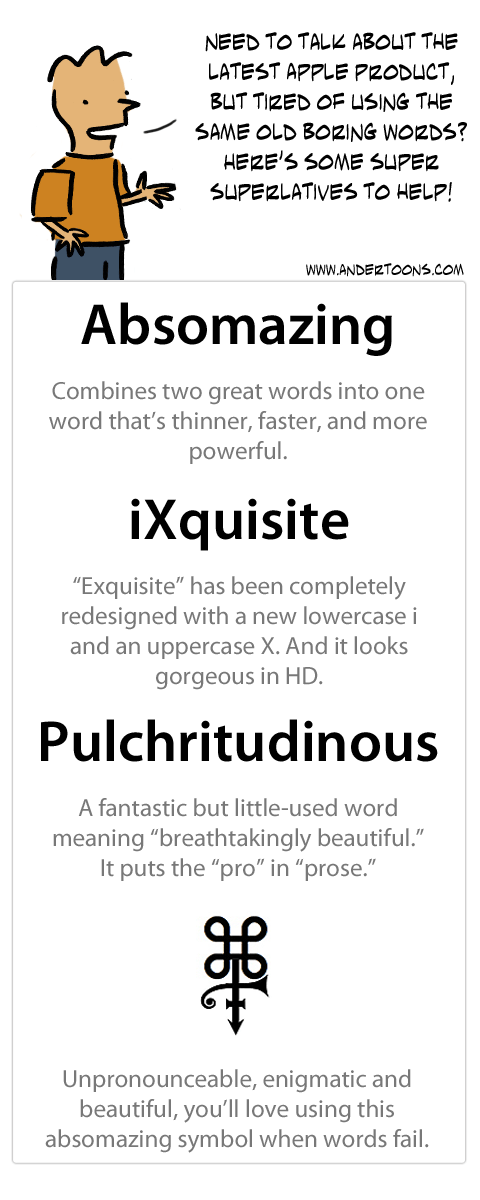
Of course the first step to adding a cartoon is to find a relevant cartoon you’d like to include in your iBook. Andertoons has thousands of cartoons on thousands of topics that are super easy to browse, buy, and download. That being said, this is a brand new market and I’m a bit unsure as how to proceed as far as price.
Normally I charge hundreds of dollars per cartoon for textbook usage, but I’m envisioning a lot of independent authors self-publishing via iBooks Author, so I’m going to begin selling iBook cartoon usage at the $30 per I currently charge for presentations.
If you’re interested in buying a cartoon for your iBook, just click the $30 presentation button and follow the checkout – no need to email me for permission. If you’re a big name publisher, drop me a line and we’ll work out something fair.
I hope this helped explain how to add a cartoon or other image to your new iBook via iBooks Author. Anyone have have any big plans for an iBook?