A while back my wife was cross-stitching something for our daughter’s room and we were discussing trying to track down a superhero or Star Wars pattern for her to do next for the boy.
After a few days of fruitless searching, it hit me that maybe I could do a big LEGO mosaic instead.
I found a wonderful resource here and set to work.
1 – The Picture
It took a while to find a nice clean image, but the pic below of everyone’s favorite astromech was just what I was looking for. (Plus, it was a lot of colors that I knew I could pick up cheaply at BrickLink.)

2 – Photoshop
There are a number of pieces of software out there to do the pattern for you, but I chose to do it myself in Photoshop. I resized and adjusted the image to fit the number of bricks/pixels I wanted (48 x 72) and created a custom color palette using RGB values for the 1×1 plates that were available.
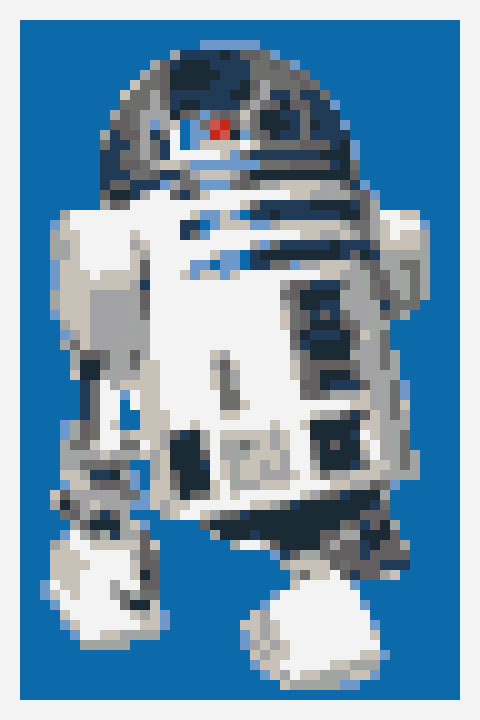
Then I adjusted the grid setting, and I had my pattern:

3 – Construction
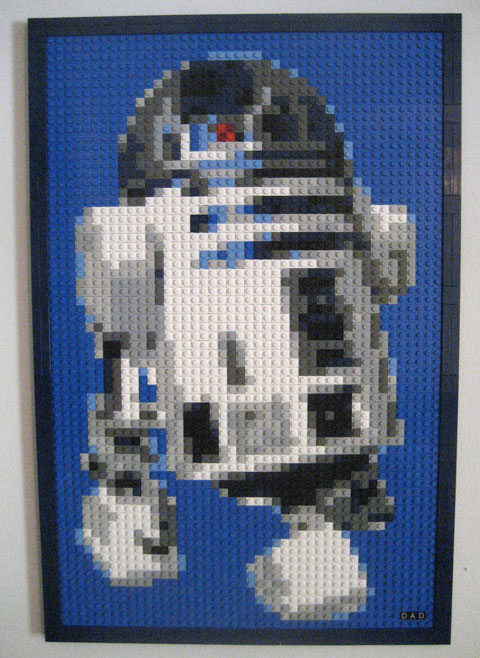
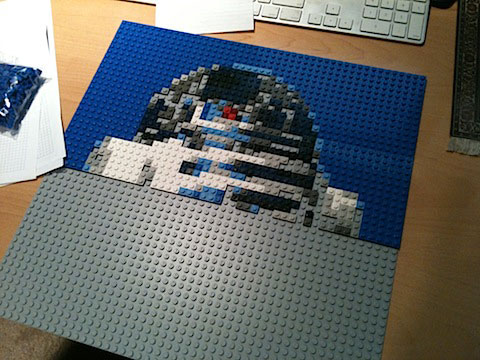
The building was actually quite easy. I worked at my desk off of the pattern in Photoshop and got it done in probably 5 or 6 hours all told. I also let the boy help me put in all the blue background to his great delight.
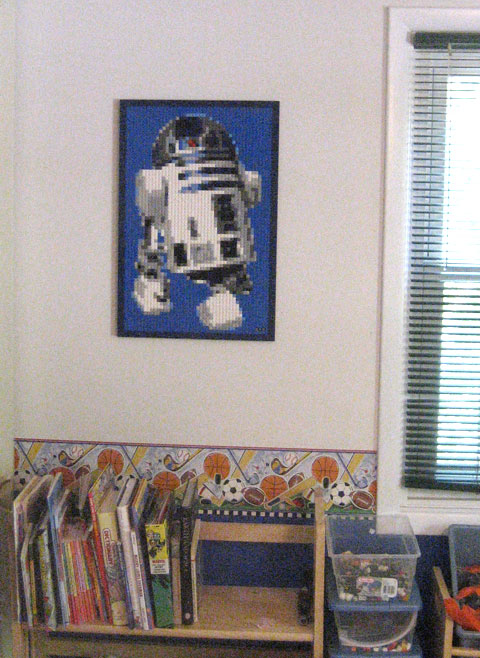
Then I added the tile frame, glued the whole thing to some 1/8" plywood, and hung it up in the boy’s room.
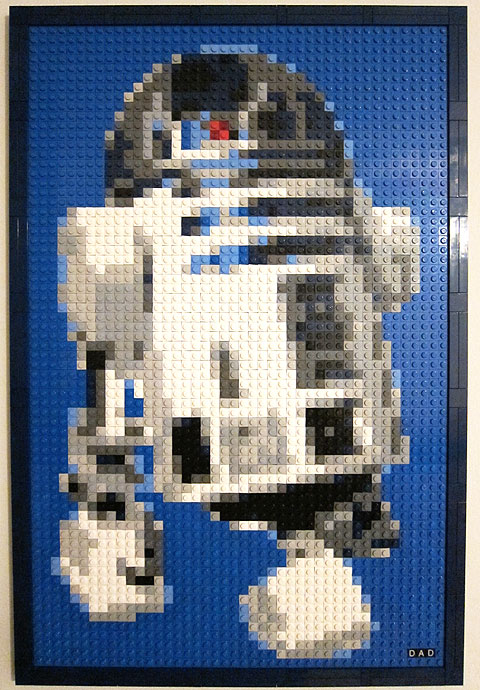
Not bad, huh?
4 – LEGO Nerd Stuff
OK, for all of the AFOLs out there, I used 12 different colors of 1×1 plates.
White, Black, Very Light Gray, Light Gray, Light Bluish Gray, Dark Gray, Dark Bluish Gray, Blue, Medium Blue, Dark Blue, Red, and Trans Red.
It’s my first mosaic, but I’m really really pleased with the results. And the boy is ecstatic.