
Cartoonist Jason Chatfield was kind enough to offer some Photoshop shortcut advice to me after seeing me muddle through coloring an upcoming greeting card.
His fill bucket advice alone would save me tons, and I mean TONS, of time when coloring, but the thing I can never get past is this…
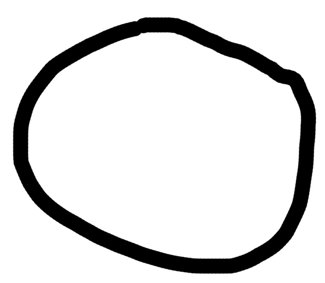
OK, here’s a circle I drew with the brush:
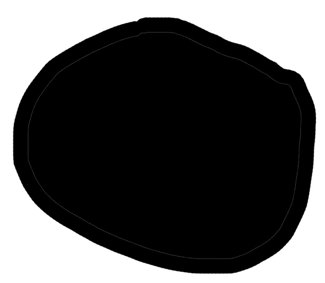
Now, using the fill bucket, I click inside the circle:
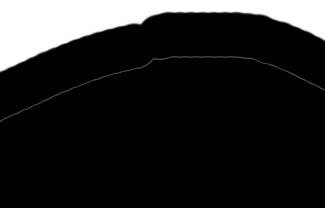
Good right? But the thing that always bugs me is this slight white line separating the original outline and the fill:
I’m really showing my PS ignorance here, but I’m not too proud to ask for a little help.
Anyone know how to get around this?
Technorati Tags: andertoons, cartooning, cartoonists, cartoons, photoshop
Mark,
It has something to do with the resolution. You won't have similar problem while working with 72 dpi.
You will be fine if you increase 'Tolerance'. When paint bucket too is selected you should see an options palette on top. By default tolerance will be 32. Try increasing it to 200 or whatever the number works for you. Also keep the Anti-alias and Contiguous check boxes checked. Hope this helps.
Srini
I believe that white line is the result of your anti-aliasing being switched on. When you chose your paint bucket tool, there should also be a box where you can click anti-aliasing on or off.
I can't describe the high I'm feeling right now, actually knowing the answer to a photoshop question.
Thanks guys! I can't believe I didn't think of the anti-aliasing. Yeesh!
I've found that using the brush tool altogether is usually more trouble than it's worth for coloring large areas.
The way I approach this is to use the polygon lasso tool to make a selection of the area I want to color. Then select what color you want as the foreground color and hit Opt-Del (on a Mac anyway) to fill the selection. Then you don't have to deal with the 'zero' effect at all.
I still use the brush when coloring small details, but I'd say 98% of the coloring I do follows that method.
Hey Chip! I've tried that approach, but it never seems as natural to me as using the brush with the Wacom tablet.
I do, however, use the magic wand quite a bit. Especially for backgrounds.
Sorry, Mark, I'm getting really stoopid these days. I posted on the wrong thread.
You get a much better result colouring with layers, and it's surprisingly easy. I have a very quick tutorial for colouring with layers on my site.
You can increasee the 'tolerance' but it bleeds to the line itself and can darken and thicken every conjoining line, so it's not ideal.
Quick, easy toot:
http://www.onlinecartoonist.com/colour_layers_tutorial.htm
I'm already on my way to check that out! Thanks!
HI, is there a simple way to evenly thicken lines allover? I am working with some line drawings and need to get bolder marks… the other question is how to get a transparent background on the same pictures, when overlapping otherwise I get the edge of one pict to cover the markings on the adjacent image. I am way ignorant on this and I am on a deadline! thaks a million Niki from Italy