
A while back I created a LEGO Catwoman line art piece that garnered not only some attention, but won me all of the 2012 Batman sets too!
I’ve since been looking for another opportunity to test the technique further, so I dug into my cartoon books, found an image I liked and, voilà, LEGO Line Art Charlie Brown:
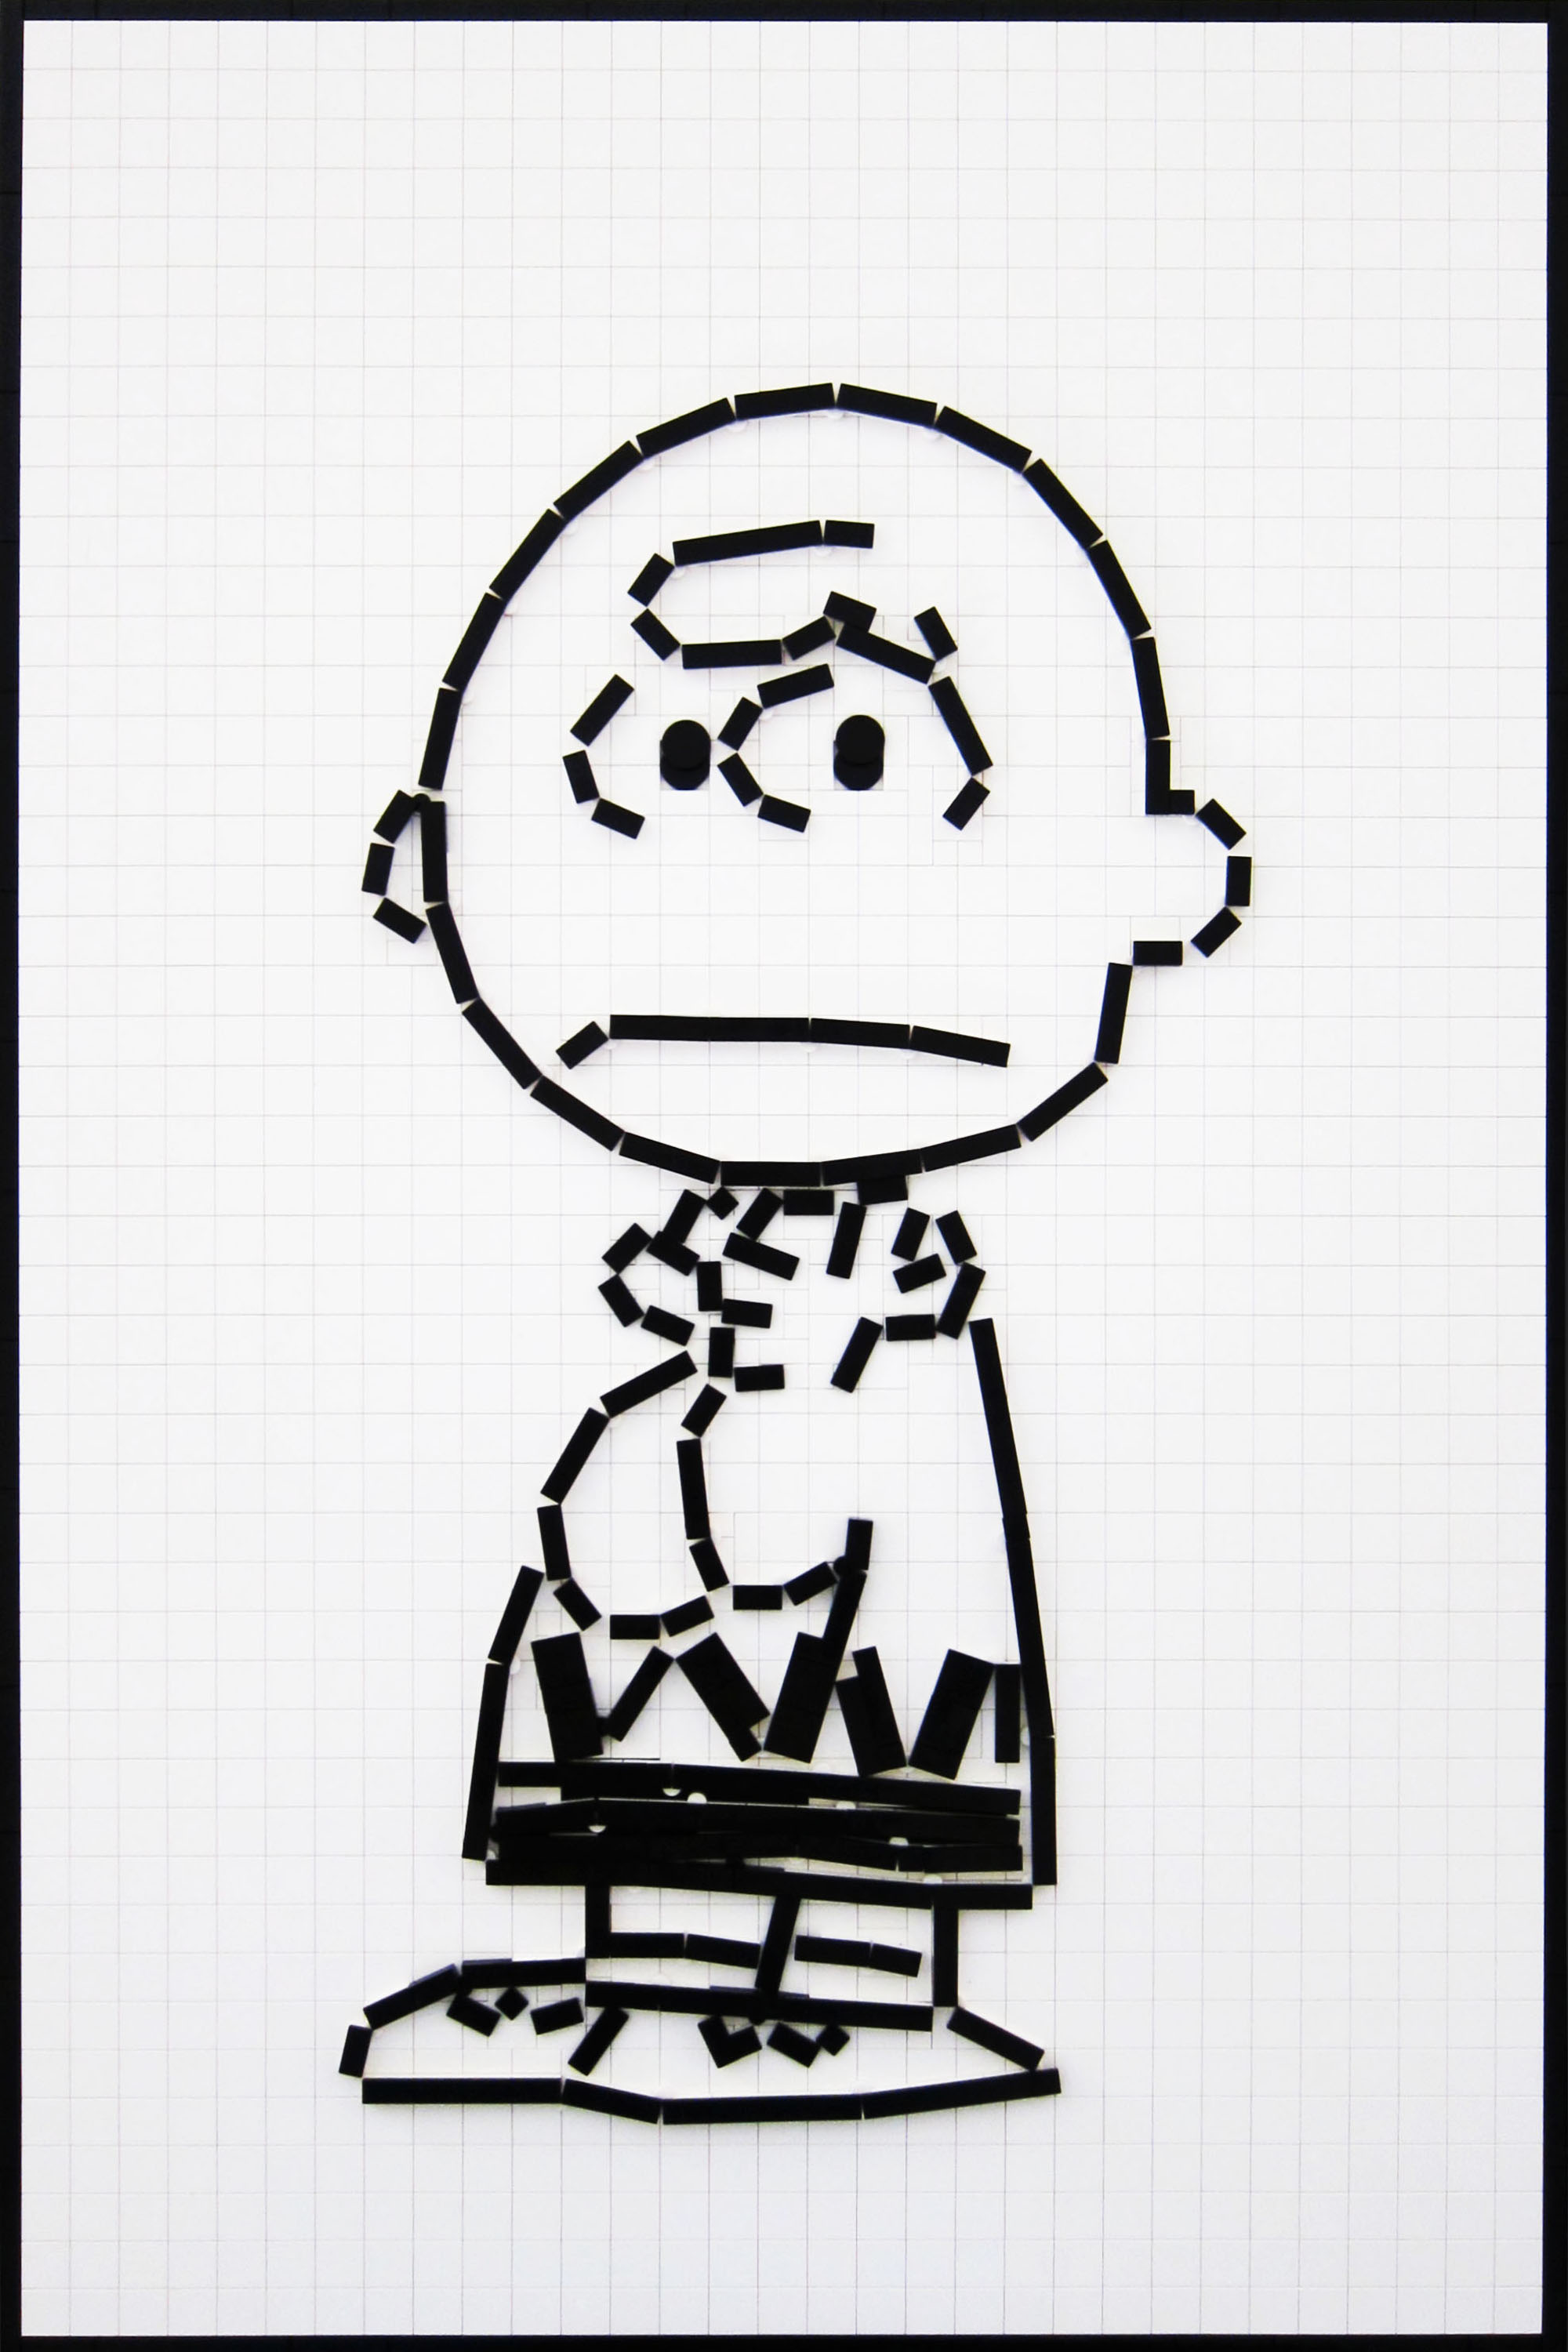
Click the above image to see it really really big!
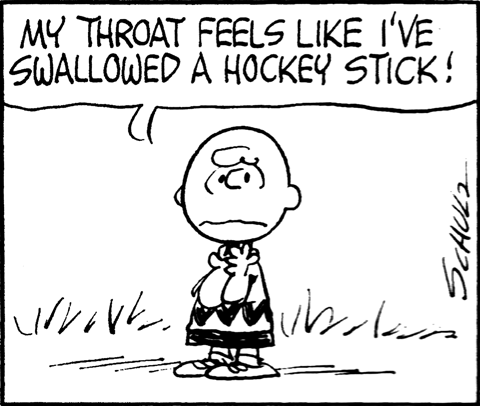
Here’s the panel I used as inspiration:
And here are a few closeups of Chuck:

When I did the Catwoman MOC I got a lot of comments that it didn’t look like LEGO. Which is very flattering, of course, but it also worried me just a bit that people thought I might be simply laying pieces on top of tiles, or using some other sort of cheat. So I wanted to share a little bit of the construction to show how the technique is achieved with standard plates, tiles, and hinges.
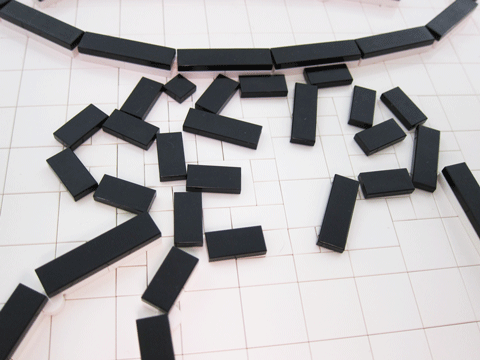
I start with a bin full of all kinds of black and white LEGO:

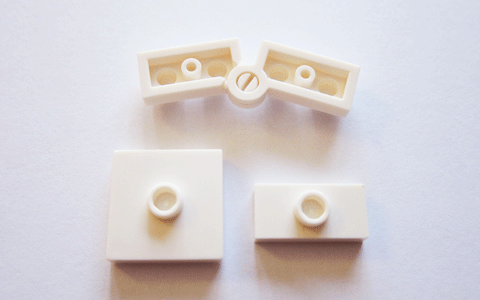
But mostly what I use are these:
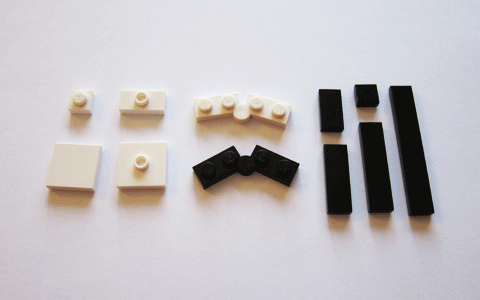
What you’re looking at above:
- 1×1 plate (3024)
- 1×2 jumper plate (3794)
- 2×2 tile (3068b)
- 2×2 jumper plate (87580)
- 1×4 hinge plate (73983)
- 1x tiles of varying length
The basic idea is that you create your lines using tiles and hinges…
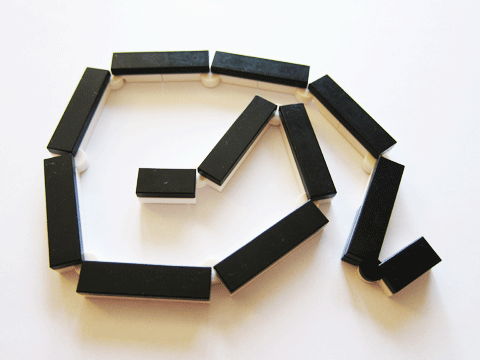
Then anchor them to the baseplate using plates and jumpers. For example, here are the anchoring studs for Charlie Brown’s head:
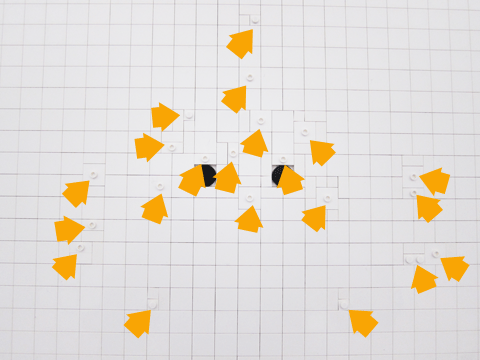
Jumpers offer another advantage in that the stud top is hollow allowing for placing connecting pieces either traditionally between the edges and the tube, or using the tube underneath as an anchor point:
In the tightest curves (Charlie Brown’s hands for example), I use a 1×2 tile both for its small size, and its lack of a tube underneath:
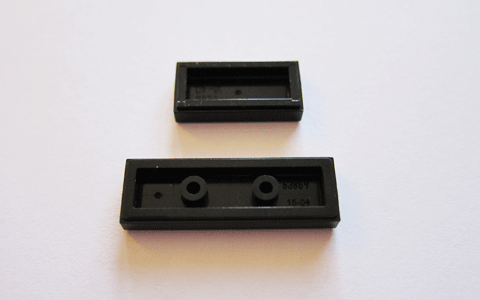
Without the tube you’re free to slide the 1×2 tile on a stud to get even more flexibility in placement.
Then you fill in the rest of the baseplate with tiles the same color as the hinges to help hide them.
I tried counting pieces as I went, but I sort of lost track as I got deeper into the build. But if you’re looking for an estimate, it’s probably right around the 2000 mark.
So there’s how I got my Charlie Brown LEGO Line Art MOC to work. I took some liberties with the original art, but I think he turned out pretty well. I’m especially happy with the expression on the face, which, for me, is the most important element.
Hope you enjoy it, and stay tuned for more upcoming LEGO projects!